Nathan Wood
Replacing the Handle on the Glass Sash of a Biosafety Hood

1. How This Came to Be
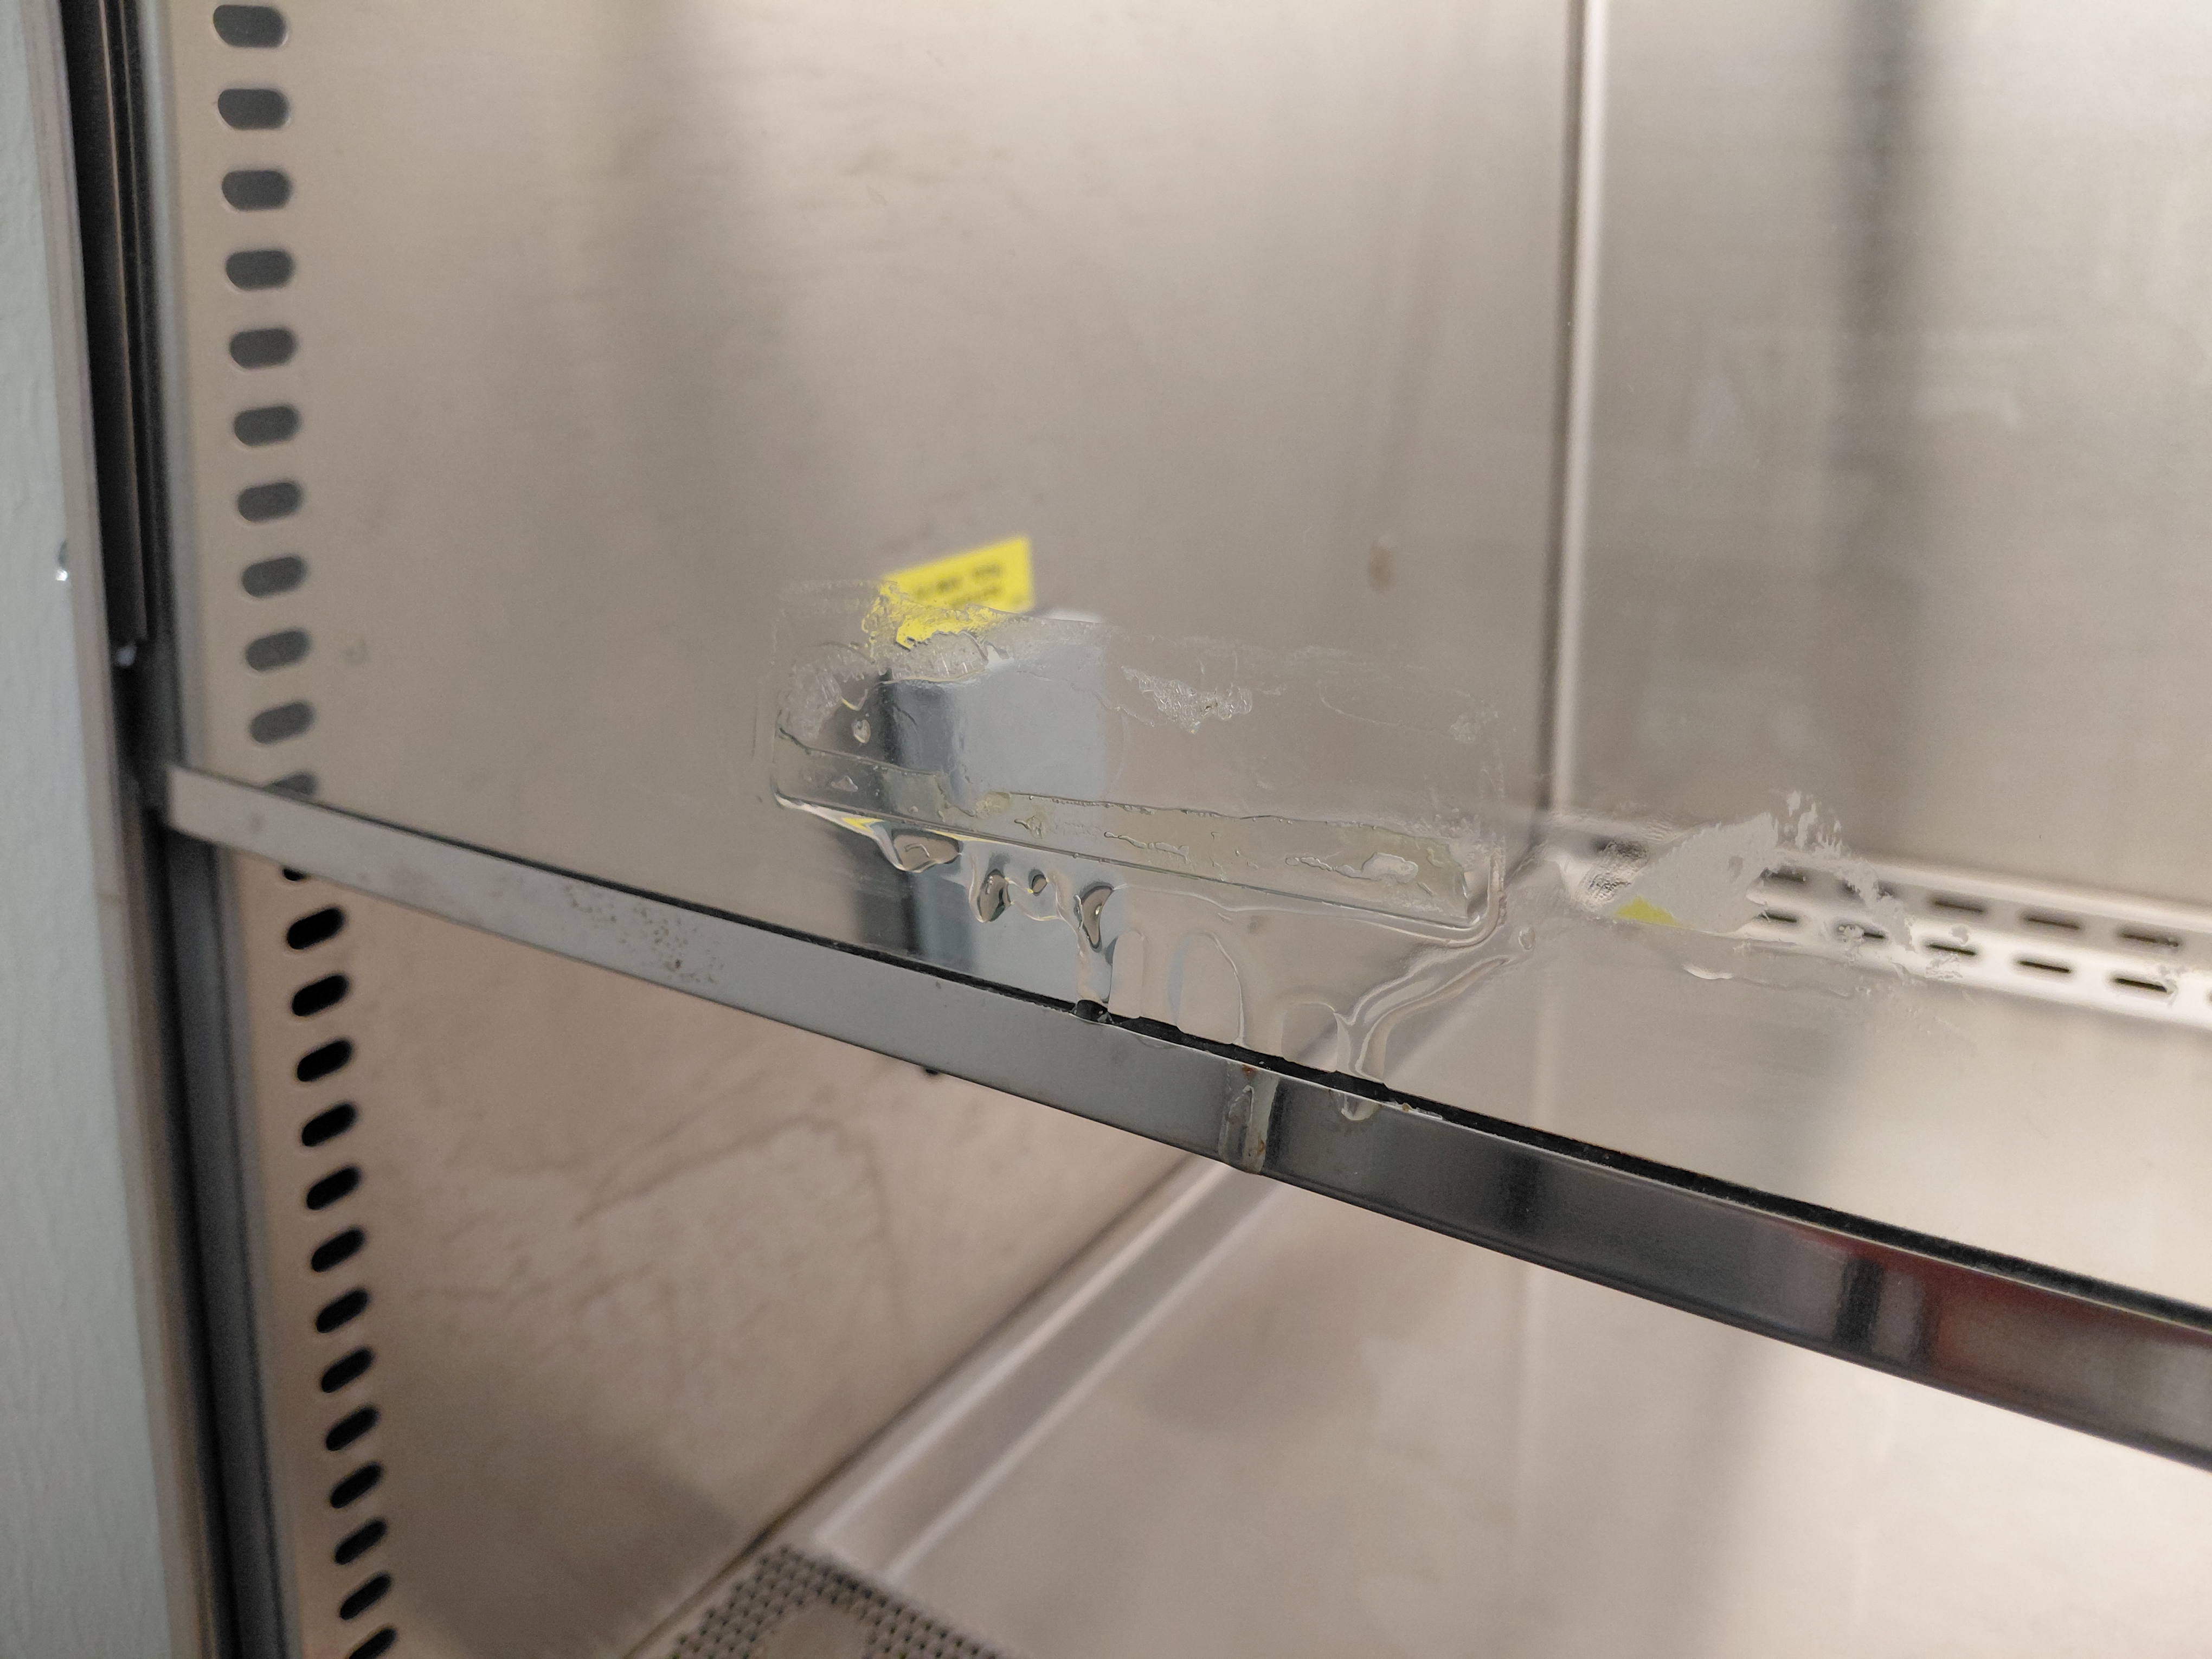
Sometime in November 2024 another graduate student reported that the left handle on the sash of the Biosafety (BSL2) cabinet had broken off. At this point the BSL2 cabinet sash has only one handle. Because of the pulley system on both sides sash, which ultimately straddle the BSL2 cabinet, it was incredibly difficult to close the hood. The amount of force required to close the one-handled sash was so great that other graduate students would call me to tell that they are done and if I could come over to close the sash for them. Furthermore, if the remaining handle on the sash broke, the entire BSL2 cabinet would be unopenable and become inoperable.
Ultimately this is problematic. Some graduate students being unable to properly close the BSL2 cabinet sash is a compliance issue, as proper use of apparatus cannot be accomplished.
2. Materials Needed
- Epoxy, two part, such as JB Weld
- Razor scraper
- Acetone
- Acetone resistant container
- Paper towels
- Permanent marker or grease pencil
- Ruler and/or tape measure
- 2 Clamps, either typical C-clamps or bar clamps
- (Optional) Lint free wipes
2.1 What Adhesive to Use?
We should rather discuss what adhesives to not use first
- Super glue becomes too brittle for significant and repeated load bearing that a BSL2 cabinet would experience. The “exact fit” between intimate parts (think fixing porcelain) owing to its low viscosity is irrelevant to mending the sash handles.
- Hot Glue (from glue gun) is too soft for load bearing.
- Silicone adhesives are better used as sealants or flexible components rather than for structural bonding.
What you need are epoxy resins.
Examples of epoxy adhesives include
- JB Weld and derivatives
- Loctite 615, 9460, and 11C
- 3M Scotch-Weld 1838 and the DP Series
In this case we used JB Weld, though for sensitive applications you may need agents such as the Loctite 11C or 1838 series, which do not emit volatile agents during the curing process (irrelevant for our use case, but critical when working with optical equipment or precision electronics).
2.2 Why Acetone?
Acetone is an organic solvent that will dissolve any remaining adhesive residues on the handle or sash. It also is useful for ensuring a clean surface for a strong bond between the handle and the sash. However, acetone can damage certain finishes and materials, such as polystyrene. Make sure that whatever materials you are working with are compatible with acetone. If one cannot consult a resource expose a nonessential or nondescript part of the material to a small amount of acetone and observe any changes over 24 hours.
3.1 Removal of Residues from Sash
- Attach a razor to the razor scraper if it has not already been.
- Use the razor on the scraper to remove any remaining adhesive on the sash.
- Using a paper towel soaked in acetone, wipe the region many times to remove any additional residues.

3.2 Removal of Residues from Handle
- Try to remove any bulk adhesive remaining on the handle. Be careful if using the razor scraper as you may injure yourself.
- Place handle in acetone resistant container.
- Add enough acetone to the acetone resistant container to submerge the handle. Allow the handle to be submerged for 30-60 minutes.
- Check the handle for any bulk residue, wipe with paper towel, then with lint free wipe if available, then allow to dry.
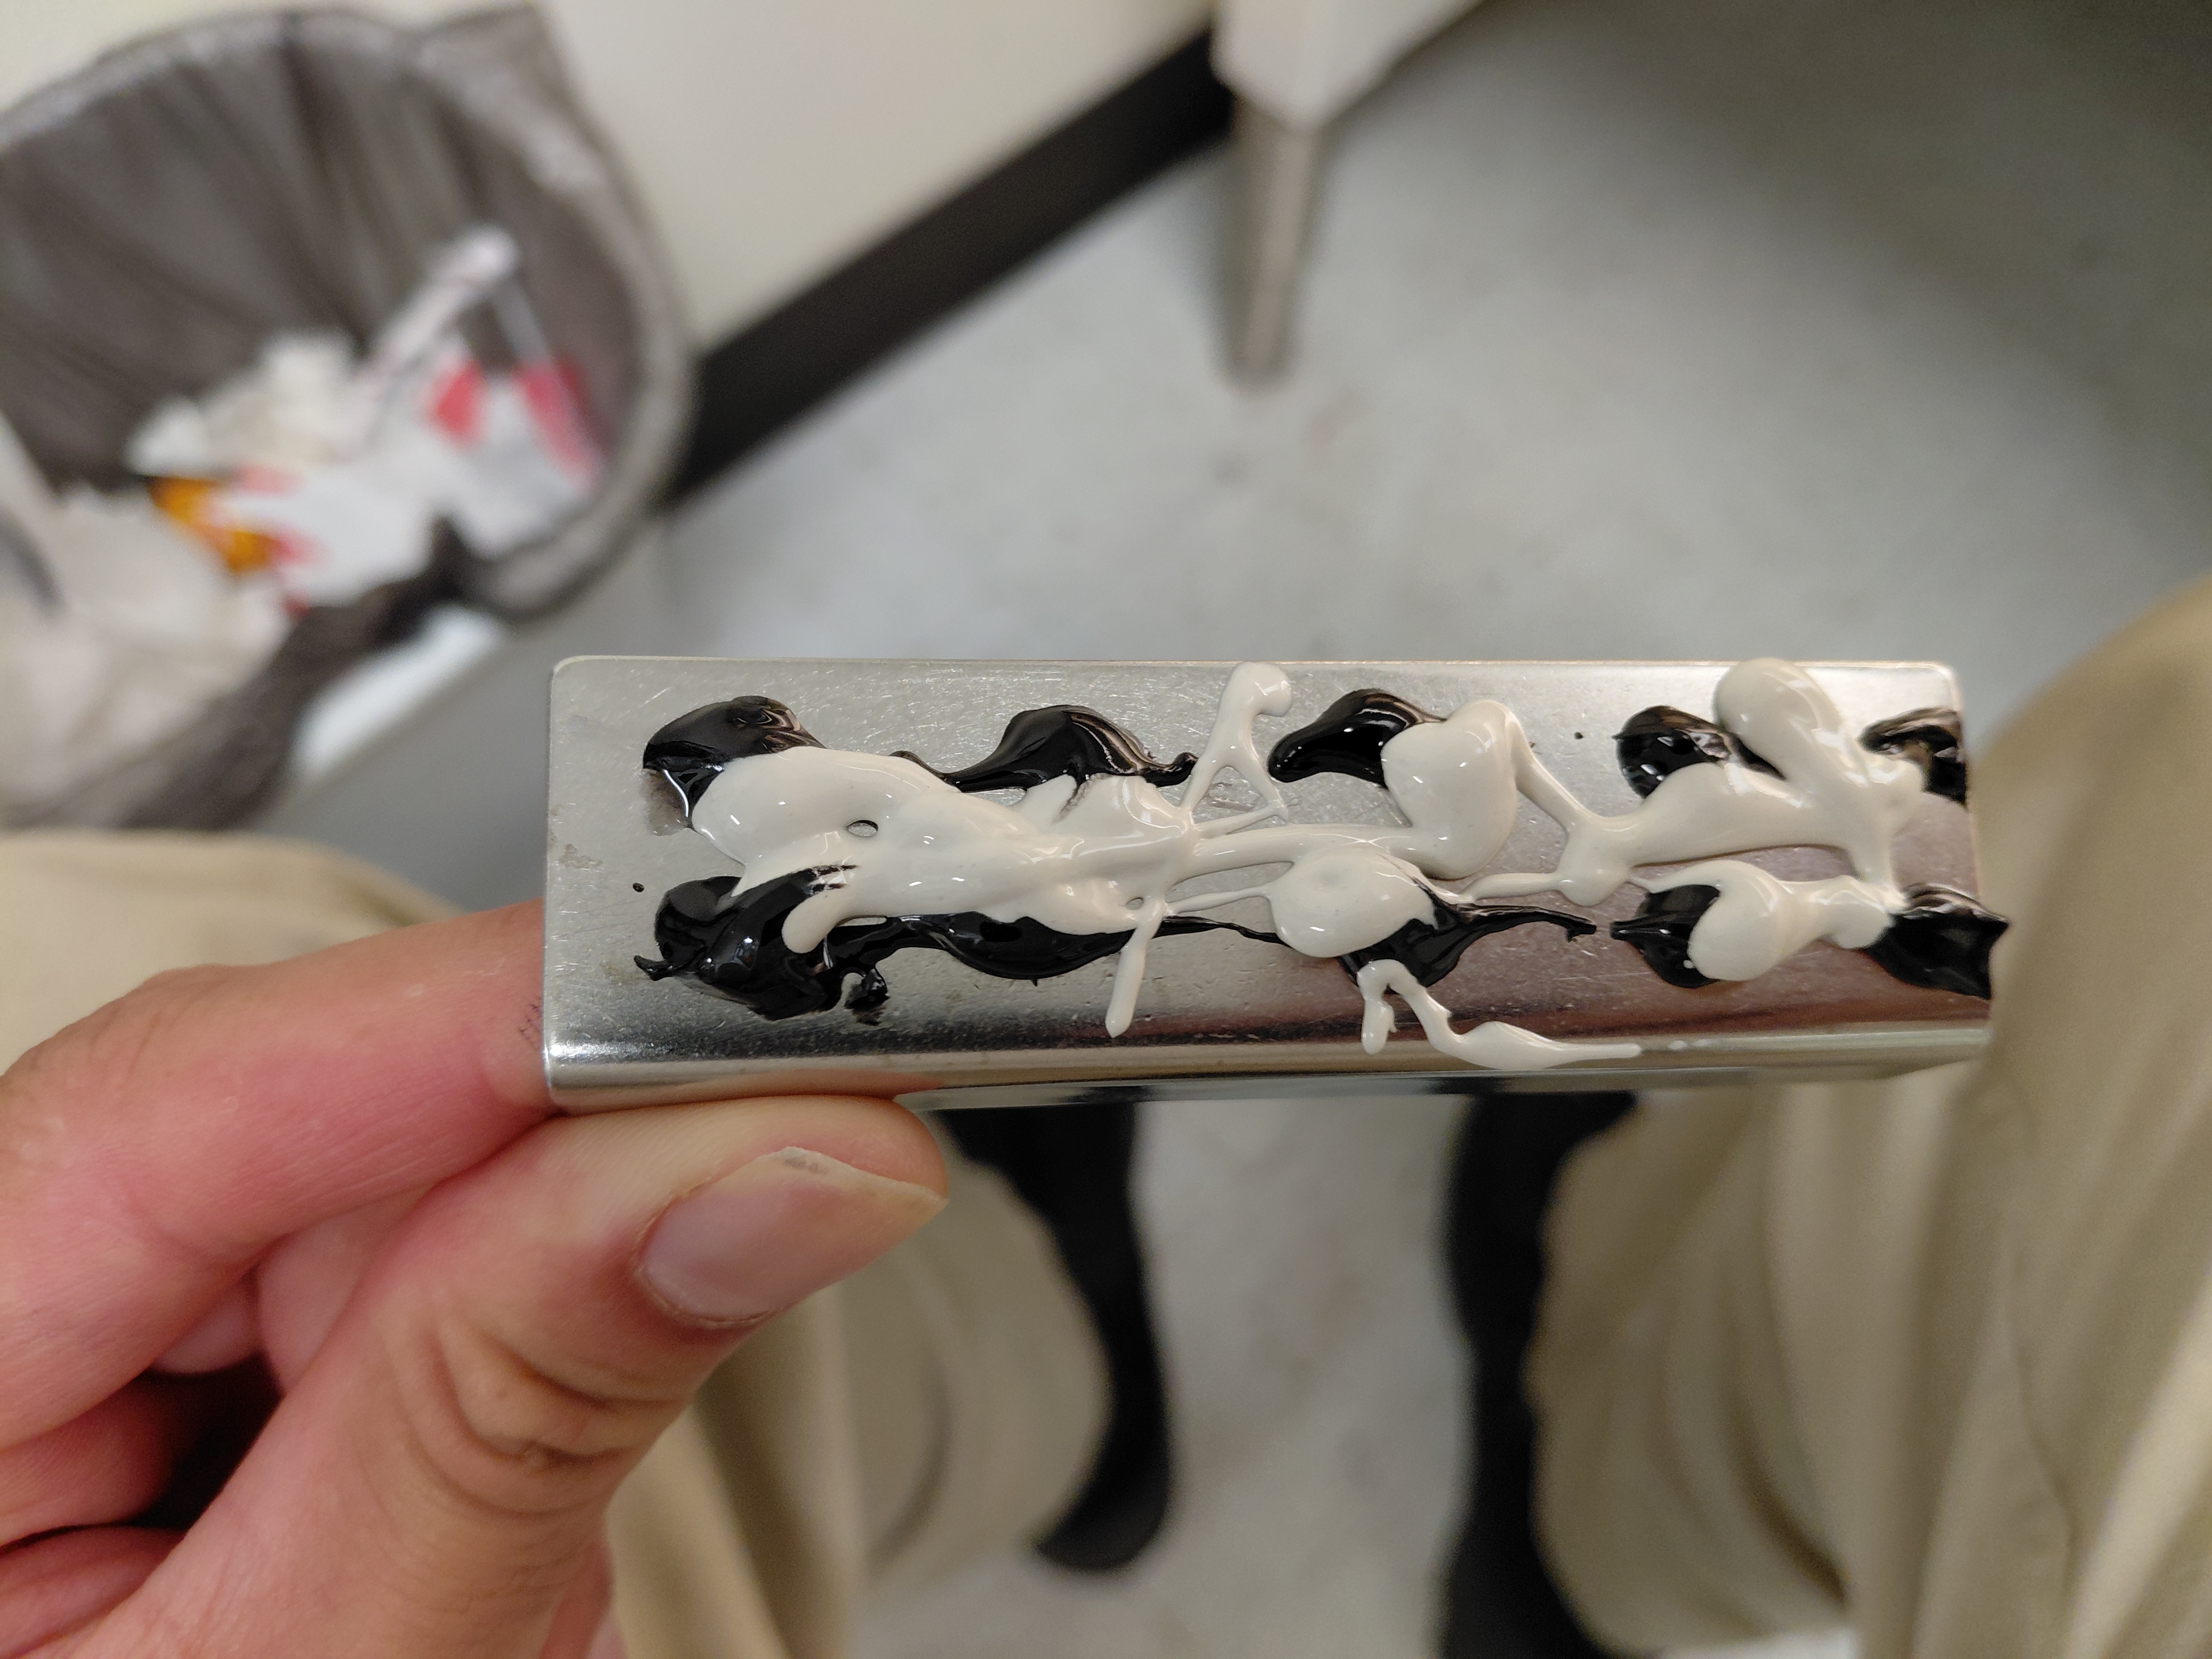
3.3 Mixer for Epoxy Components
You will need to use something to mix the two epoxy components together that does not leave any dust or residues (as a Q-Tip could). In this case I just cut a strip of plastic out of the packaging the JB Weld came in.
3.4 Preparation: Marking
- Using a rule and/or tape measure and the remaining handle on the sash, note the distance of the remaining handles ends from the rightmost side and bottom of the glass sash. This should be the distance from the leftmost side and bottom for the left handle that we are reattaching.
- Using the ruler and/or tape measure, mark using permanent marker or grease pencil where the handle should be reattached based on the distances derived from the still-attached handle.
4. Execution
- Ensure that your two clamps are adjusted such that it is relatively quick to secure the handle to the sash.
- If possible, use a lint free wipe or paper towel soaked in acetone to wipe down the region of the sash and side of handle that will meet together. Allow to air dry for about one minute.
- Apply the first component of JB Weld in pea sized beads across the surface of the handle that will interface with the sash.
- Now apply the second component in pea sized beads next to the previous beads made with the first component.
- Using the aforementioned stirrer, thoroughly mix the two components on the handle, ensure a homogeneous mixture (in a black-white JB Weld, the mixture should be uniformly gray).
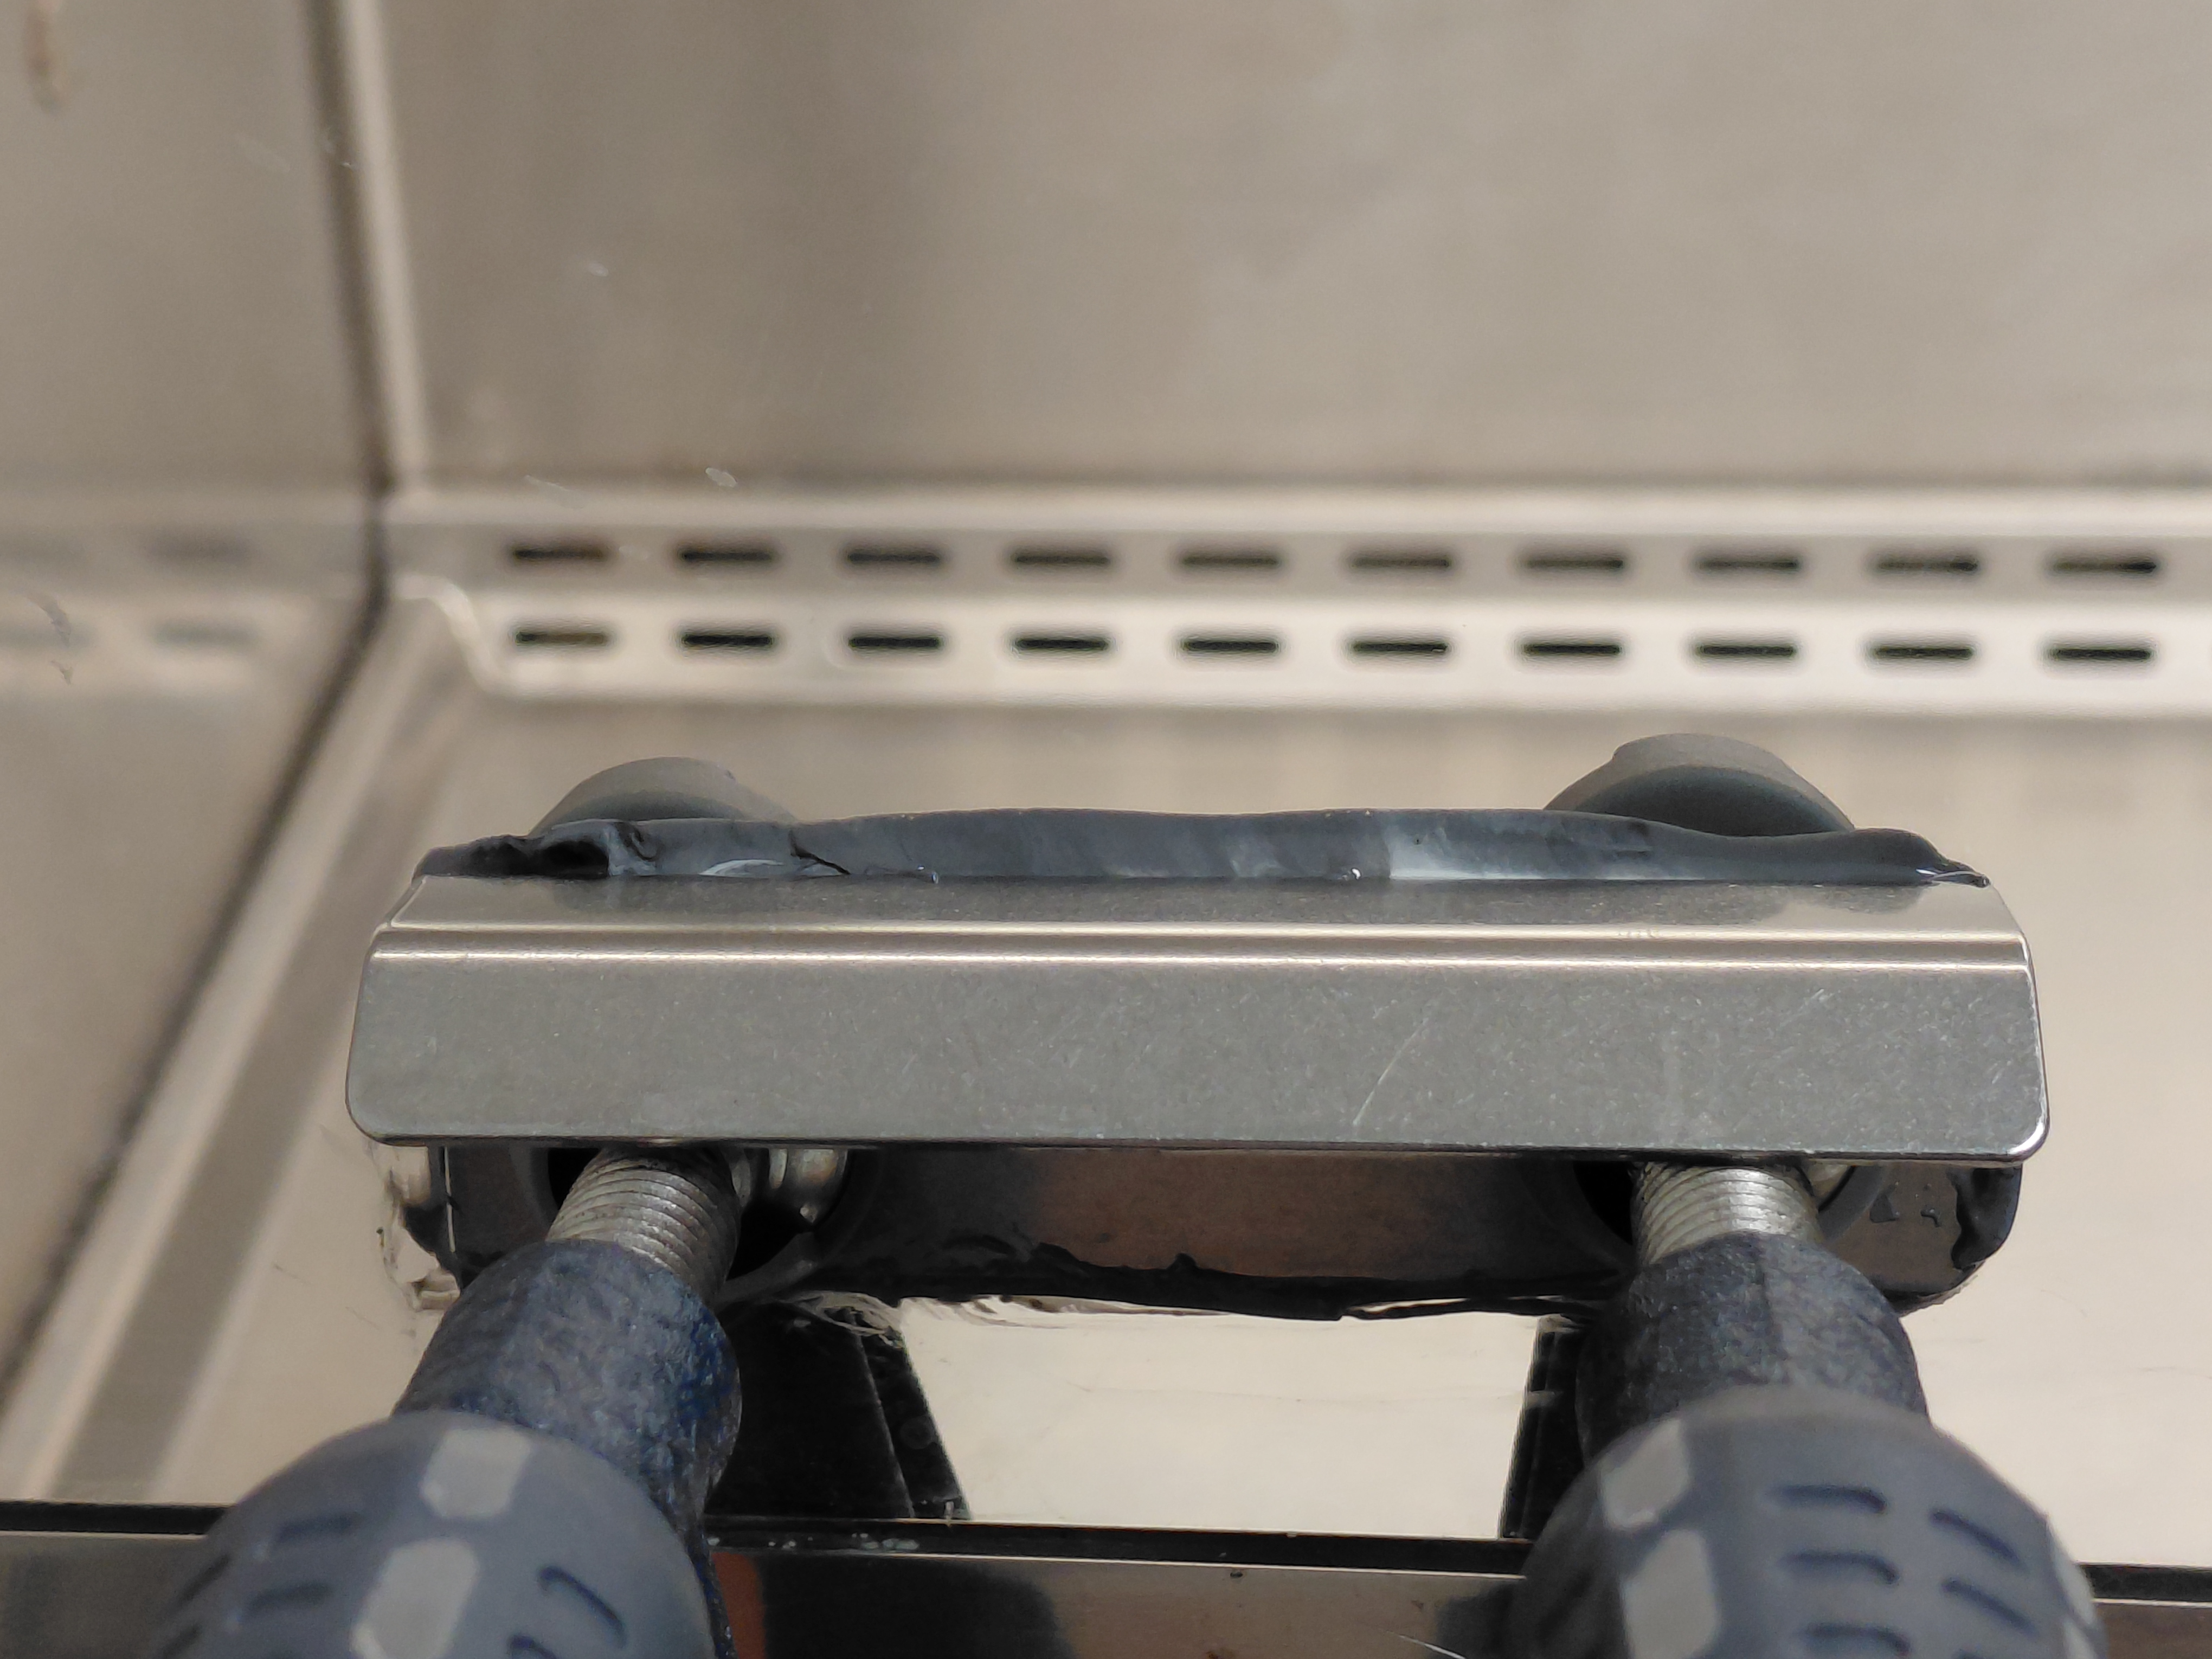
- Adhere the handle to the sash, try to make sure it is parallel with the bottom of the sash and in the marked position.
- Quickly adjust the two clamps on each side of the handle (one at a time). Be careful not to overly tighten on either side as this may misalign the handle.
- Once the handle is secured to the sash using the clamps, make small adjustments to make the handle as parallel with the sash bottom as possible. Be aware that excessive adjustments may worsen the situation.
- For cosmetic reasons, one may want to remove excessive epoxy that squeezed out of the interface between sash and handle. This can be done with the razor on the scraper or with a bit of plastic. Be careful not to disturb the clamped handle.
- Allow the handle to cure for at least 24 hours prior to use. Do not use the BSL2 cabinet while the epoxy is curing.

5. Conclusions
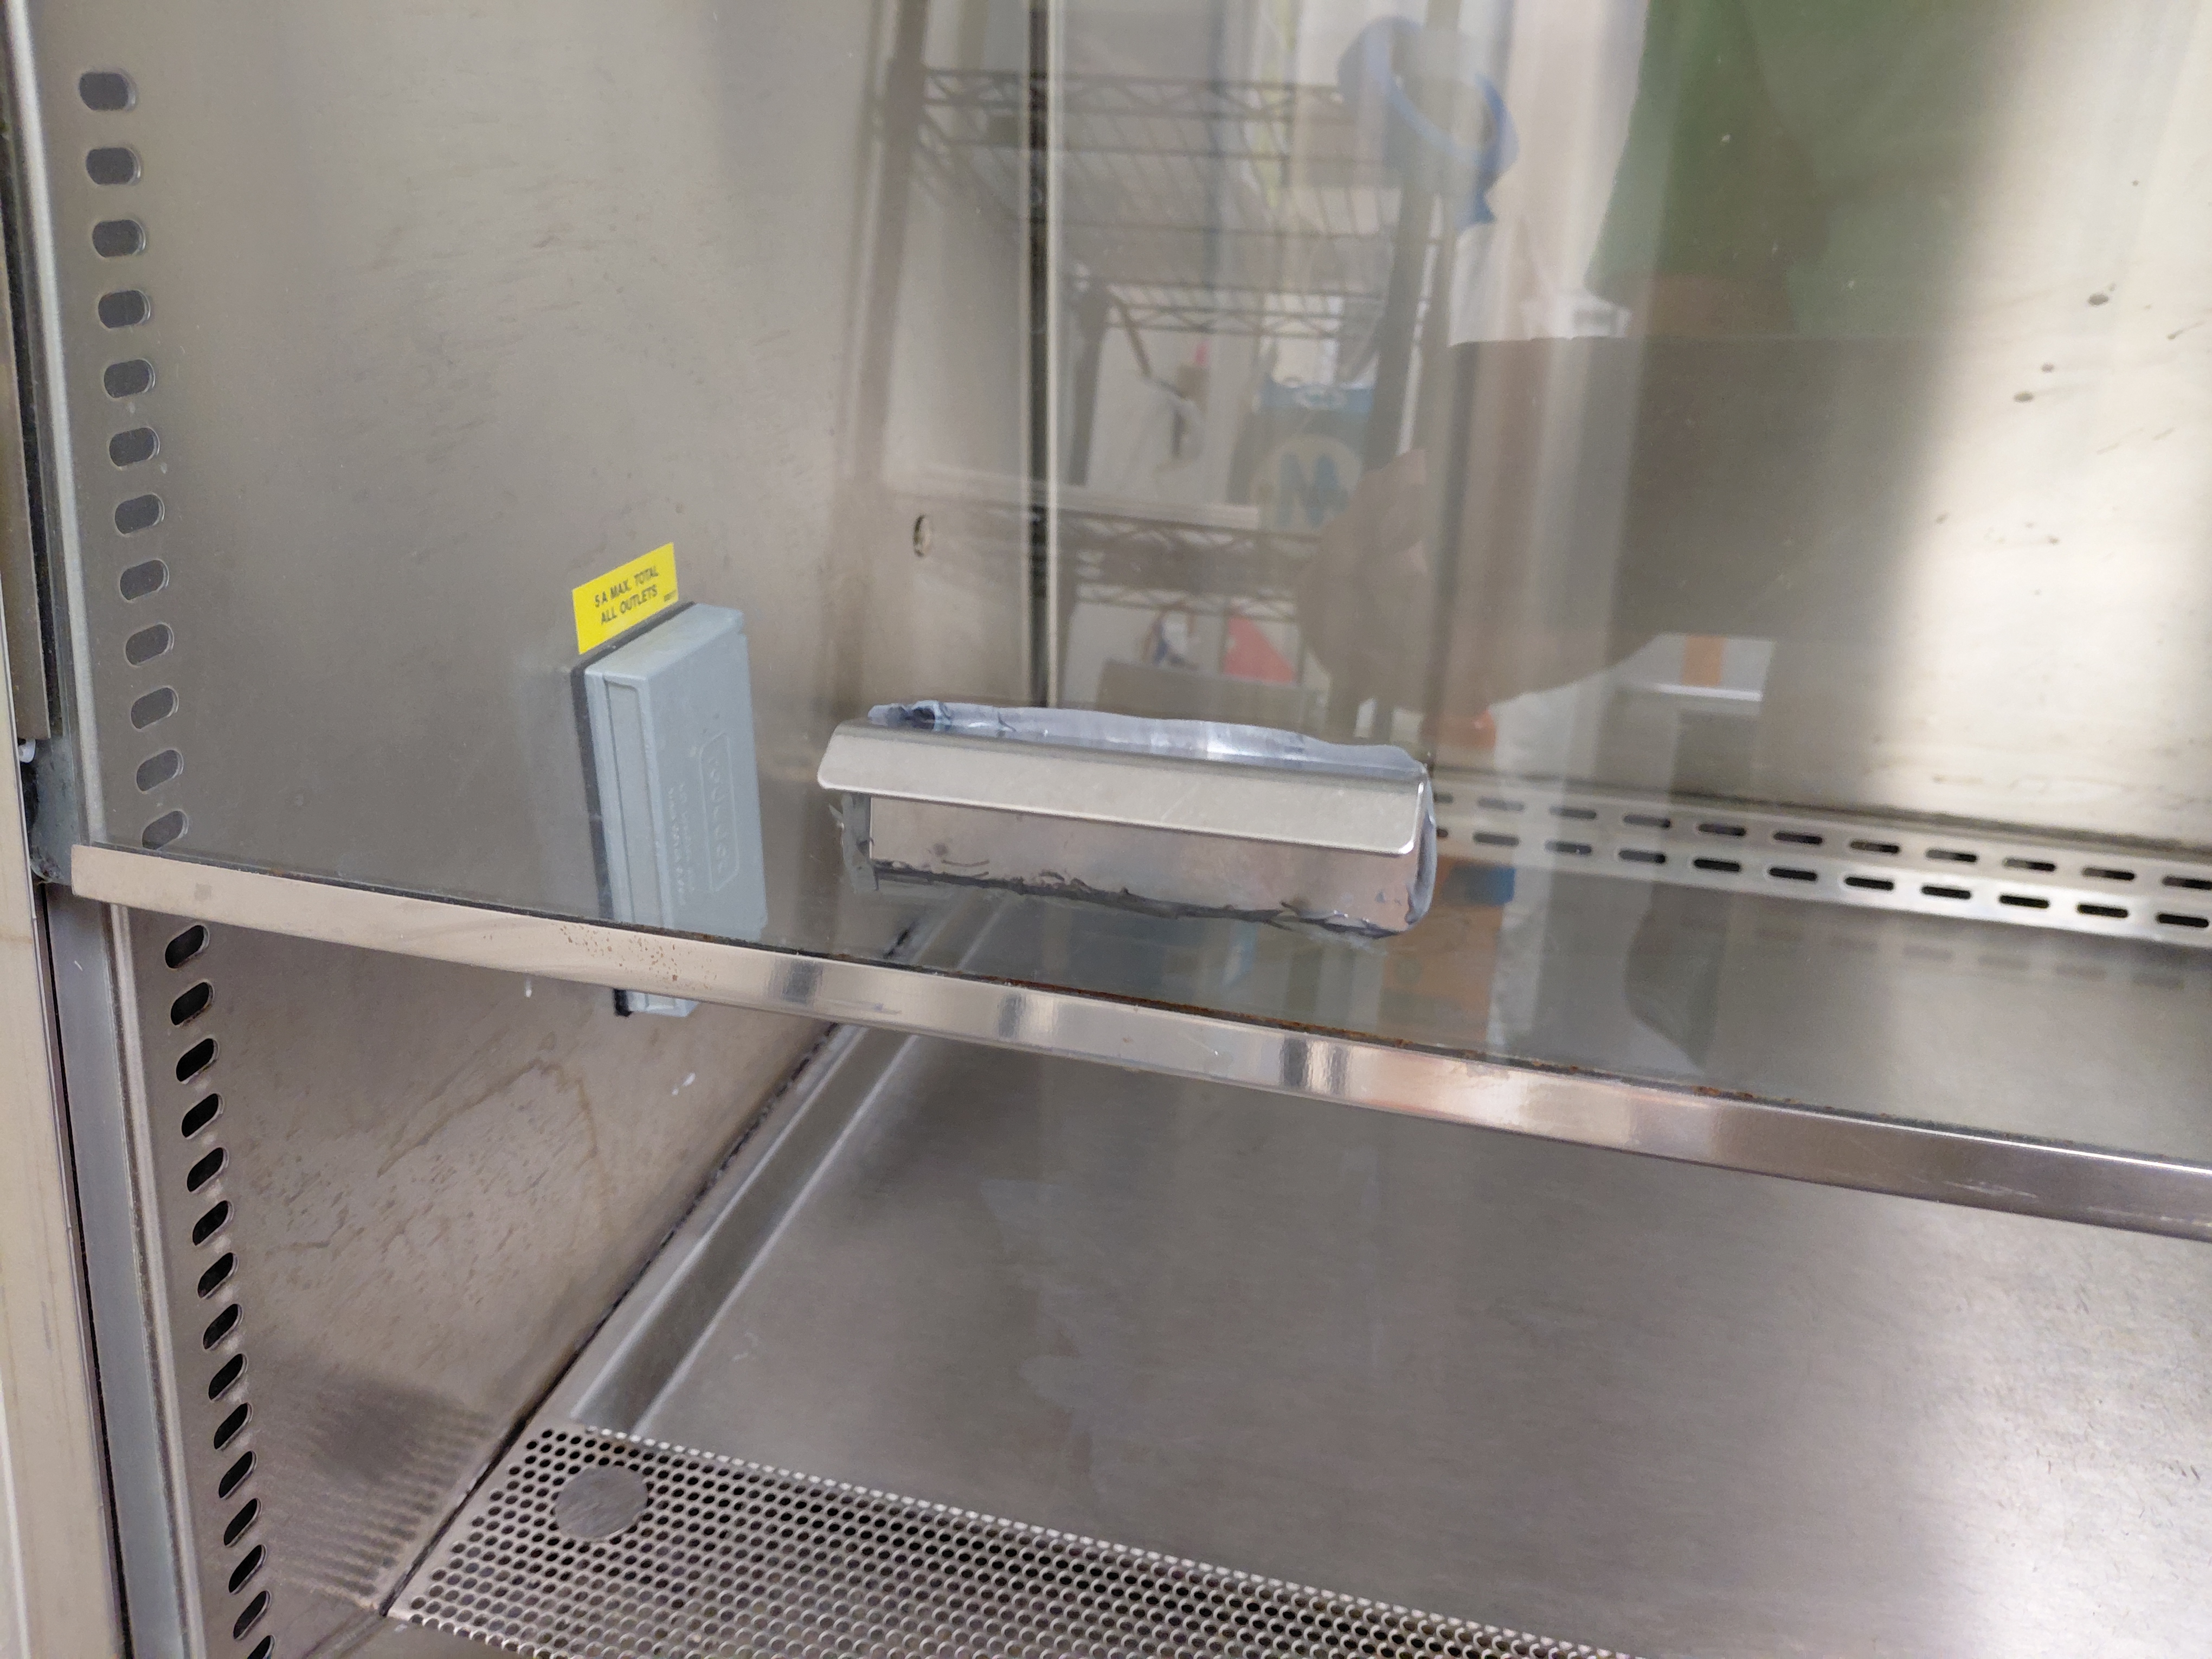
Viola! The BSL2 cabinet’s leftmost handle has been reattached. Those who could not close the handle can now close it without assistance.